Drone Photo Editing Tips for Stunning Results

Drone photography offers a unique perspective on the world, but capturing breathtaking aerial shots is only half the battle. The magic often happens during the photo editing process, where raw images transform into stunning works of art. Whether you’re a seasoned drone photographer or a beginner, learning the right drone photo editing techniques can take your shots to the next level.
In this guide, we’ll dive into expert tips, tools, and post-processing techniques that can help you enhance your drone photos. From adjusting exposure to correcting colors and using professional software, you’ll discover everything you need to know to create stunning Drone Photo Editing Tips.
1. Start with Proper Exposure and Composition
Before you even think about editing, the foundation of a great drone photo begins with proper exposure and composition. While this may seem obvious, it's essential to understand the importance of these aspects in your final results.
Exposure:
Drone photos, especially in bright daylight, can suffer from overexposure or underexposure. Overexposed images will lose their details in bright areas, while underexposed ones can appear too dark. It’s crucial to adjust the ISO settings and shutter speed before capturing the photo. In post-production, programs like Adobe Lightroom or Adobe Photoshop can help you tweak exposure to get that perfect balance.
Composition:
Drone photography allows you to explore unique angles, but keep traditional composition rules in mind, like the rule of thirds and leading lines. This will ensure that the photo is not only visually appealing but also ready for editing with minimal cropping.
2. Use HDR (High Dynamic Range) for Better Details
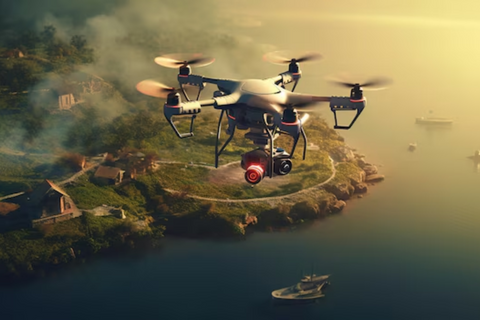
Sometimes, even with the perfect exposure, a single drone image can’t capture the full range of light in a scene. That’s where HDR (High Dynamic Range) comes in handy. Using this technique involves taking multiple shots at different exposure levels (e.g., overexposed, underexposed, and balanced) and merging them in post-processing software. This creates an image that retains detail in both shadows and highlights, producing more vivid and dynamic results.
Many modern drones, such as those from DJI drones, come with HDR shooting modes built in. After capturing the images, use editing software to blend the exposures together. Lightroom is particularly effective for HDR edits, giving you more control over the intensity of the effect and allowing you to fine-tune the details.
3. Correct Distortion and Lens Effects
Another challenge unique to drone photography is lens distortion. Drone Photo Editing Tips often have wide-angle lenses, which can cause barrel distortion, where straight lines appear curved, especially at the edges of the image. Fortunately, most professional editing software can correct these distortions automatically. In Lightroom, for example, you can use the lens correction feature, which detects the lens used and applies automatic adjustments to straighten the lines.
Additionally, vignetting (a gradual darkening of the image towards the edges) is common in drone images. You can either correct this effect or, if used intentionally, enhance it for artistic purposes. Fine-tuning these aspects can make your drone photos look cleaner and more polished.
4. Enhance the Sky with Gradients

One of the most striking elements of aerial photography is the sky. Often, drone photos feature a vibrant sky, either full of dramatic clouds or a beautiful sunset. However, it’s easy for the sky to get washed out or overly bright in the original image. To enhance the sky, use gradient filters in your editing software.
In Adobe Lightroom, you can use the gradient filter tool to adjust the exposure, contrast, or saturation of the sky without affecting the rest of the image. You can also manipulate the temperature of the sky to make it warmer or cooler, depending on the look you want. This step helps in bringing out the natural beauty of the sky, which is often the most attention-grabbing element in a Drone Photo Editing Tips.
5. Fine-Tune Color with White Balance
Drone photos, especially when shot in different lighting conditions, can sometimes suffer from color imbalances. White balance plays a critical role in ensuring your colors look natural. For example, images shot in the early morning or evening might have a cool or warm color cast, which can be corrected in post-production.
In Lightroom, adjusting the white balance is simple. Use the eyedropper drone tool to click on a neutral area (like a white or gray object) in the photo to set the correct white balance. From there, you can tweak the temperature and tint sliders to get the colors looking just right. This correction ensures that the final image looks realistic and true to life.
6. Use Local Adjustments for Precision

Local adjustments allow you to make specific edits to certain areas of your image without affecting the whole photo. For instance, if the foreground of your drone shot is too dark while the sky is well-lit, you can use brush tools in Lightroom or Photoshop to selectively brighten the foreground.
The graduated filter tool is another local adjustment that can help you make gradual changes across your image. This is especially useful for balancing light and shadow in a drone shot, ensuring that no part of the image is too harsh or too underexposed. Local adjustments provide an incredible amount of control for detailed editing and fine-tuning specific areas of your Drone Photo Editing Tips.
7. Sharpening and Noise Reduction
Drone photos, especially in low-light conditions or high ISO settings, can suffer from noise (graininess). Noise reduction is crucial for achieving sharp, high-quality images. Most photo editing software comes with built-in noise reduction tools that allow you to reduce grain while preserving fine details.
At the same time, you’ll want to apply sharpening to enhance the overall crispness of your image. In Lightroom or Photoshop, you can adjust the sharpening sliders to enhance edges, making the photo appear clearer. However, be careful not to overdo it, as excessive sharpening can introduce artifacts and make the image look unnatural.
8. Enhance Contrast and Saturation
To give your drone photos that extra pop, tweaking the contrast and saturation can work wonders. Increasing contrast helps bring out the differences between light and dark areas of your image, making it appear more dynamic. Similarly, enhancing saturation boosts the intensity of colors in your photo, giving it a vibrant and eye-catching look.
In Lightroom, you can adjust these settings using the tone curve and HSL sliders. For more subtle color enhancements, try adjusting individual colors to make certain elements in the image stand out, such as the blues of the sky or the greens of the landscape.
9. Retouching with Photoshop
For advanced users, Adobe Photoshop offers extensive tools for fine-tuning drone photos. You can remove unwanted objects, fix blemishes, or apply selective adjustments to specific parts of your image. For instance, if you have a power line or an unexpected element in your drone photo, the content-aware fill tool in Photoshop can seamlessly remove it, giving you a cleaner image.
Layers and masking in drone Photoshop also allow for highly precise adjustments, such as enhancing the shadows or highlights in specific areas of the photo, or adding custom effects like blur or sharpening.
10. Use the Best Drone Photo Editing Apps
If you prefer using apps instead of desktop software, there are plenty of best drone photo editing apps available. Some popular options include:
- Snapseed: A free app by Google that’s perfect for quick edits, with tools like lens blur, color correction, and noise reduction.
- Lightroom Mobile: A mobile version of Adobe Lightroom that allows for advanced photo edits on the go, including RAW editing and powerful presets.
- VSCO: Known for its stylish filters and easy-to-use interface, VSCO is great for making your drone photos look sleek and polished.
These apps offer a range of features that can help enhance your drone photos without needing to be a professional photographer.
Drone photo editing tips
Editing drone photos is an essential skill for photographers looking to make the most of their aerial shots. By following these drone photo editing tips, from correcting exposure to enhancing colors and using professional tools, you can elevate your drone photography and create images that truly stand out. Whether you prefer using Lightroom, Photoshop, or mobile apps, there are endless ways to refine and perfect your drone images. With practice and patience, you’ll be able to produce stunning drone photo edits that showcase the beauty of the world from above.
Find your perfect drone at our online drone store, where top-tier technology meets expert support. Transform your aerial projects with our premium selection.


